How To Use A Walkie On Set – A Complete Guide
Almost everyone on set will be using a walkie and they are pretty simple to use. Compared to a Smart Phone, they are child’s play – you press the button to speak, you take your finger off the button to listen. But on set, this technical simplicity is offset by specific etiquette and language regarding their use, which can take some getting use to. Not knowing the protocols can result in embarrassing rookie mistakes, poor communication and will make you look unprofessional. So here’s a quick primer on how to use a walkie like a pro:
First, something to keep in mind: When directing, Clint Eastwood’s sets are very calm and orderly. This is because Eastwood once attended a White House dinner and had been impressed by the barely audible use of walkies by the Secret Service agents who were carrying out complex duties. Traditionally walkie use on set meant an incessant squawking of open mics but Eastwood pushed his crew to use them with the same subtly as those secret service agents making for a much quieter working environment. So when using your walkie, think secret service! These devices are an extremely useful aid to effective communication, but they should NOT create additional noise or irritation. An orderly, efficient set is the target here.
Click here to learn more about InFocus Film School’s Film Production Program!
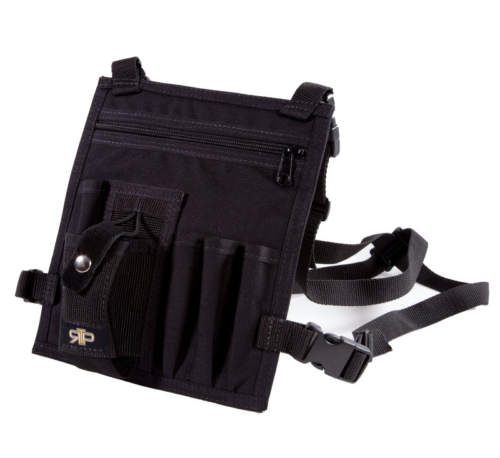
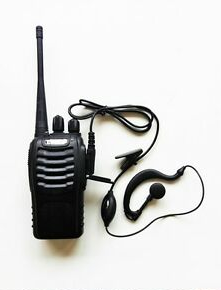
The Elements of a Walkie
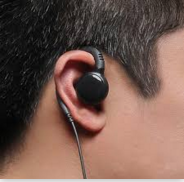
Standard Ear Plug
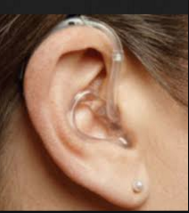
Custom Ear Mold
How To Wear Your Walkie
Firing It Up
- Plug your headset into the walkie jack while the walkie is still turned off.
- Your walkie has two dials on the top – an on/off/volume button and a channel dial.
- Using the on/off/volume button, switch the walkie on and set the volume to around mid level (later adjust to the quietest volume that is workable for you).
- Check the channel button to ensure you are on channel one (or the channel you have been instructed to use)
- Press the speaker button on the cord, and carry out a walkie check, which will go something like this: “This is Steve, walkie check”. Another crew member will respond back something like “Good check” to confirm you can be heard. Now everyone knows you are up and running!
How To Use A Walkie – Quick Tips
- Never yell into the mic. Use a normal tone of voice to prevent hearing damage and major irritation to others!
- Keep your own walkie volume as low as possible to avoid damaging your own hearing.
- Avoid any unnecessary chatter on the walkie. Keep your transmissions brief and to the point. Remember when you talk, no one else can.
- Wait a beat or two after pressing the mic button before you start to talk. There is a delay which will cut off your first words if you jump the gun.
- When you want to call someone use your name first and their name second e.g.: “Steve for Danny”, They will respond back “Go for Danny”
- When someone talks to you always acknowledge and repeat back the core of their request: e.g. The AD asks you to move a location cone as it’s in shot, you will respond: “Copy that. Moving the cone”(so they know they been heard and heard correctly).
- Avoid “eating the mic” i.e causing distortion by having the mic too close to your mouth or speaking too loudly.
- Avoid “squelching” – that nasty blast of interference caused by two crew members trying to talk on their walkies at the same time – intensely annoying to others but, more importantly, neither person was heard. Another crew member will let you know it’s happened (you won’t hear it on your own walkie) . Start again, but one at a time.
- If filming has started and you have just switched on your walkie, do not talk right away, wait and listen to see what’s going on. They may be in the middle of recording, and, trust me, you do not want to transmit during a take.
- Keep your language entirely professional – you don’t know who might be listening (public, children, location owner etc.). Walkie channels are also monitored by the CRTC. If they deem you are using the walkies improperly they can shut down set communications. You definitely don’t want to be responsible for that!
- If you are going to be at a distance from set for a while, take a spare battery with you.
- If you take a battery out of a charger put another one on to charge. This way, you keep a flow of charged batteries available.
Off or On?
- If you are inside the doors of the studio or location turn your walkie off to prevent accidental transmissions interfering with the sound recording. When the the AD calls “cut”turn it back on. (Even with a headset transmissions can still be audible and the walkie signals can interfere with sound)
- If you are outside the doors but still close to the set keep your walkie turned down low but keep it on. This way any accidental transmission won’t be audible inside, but you can still hear what’s going on inside.
- If well beyond hearing distance of the set then just keep it at normal volume all the time.
Too Quiet?
- Check you are on the right channel. You may have “bumped” channels on the dial (easy to do).
- Your battery may be dead. A dying battery is usually heralded by a double beep when you press the speaker button. The beeps are an unfamiliar “chirping” sound. Change batteries immediately.
- You may be out of range. Keep your phone on so they can still contact you, or come back into range, which ever is appropriate in the circumstances.
Which Channel?
When you are done talking on on channel 2, then both of you will separately confirm “Switching back to 1” (or whichever channel you are heading back to)
Speak to Me!
- Copy that: “I hear you” – it’s the standard acknowledgement that you have heard someone’s communication to you.
- What’s your 20?: Radio speak for “Where are you?”
- 86 (an item) : Get rid of it e.g. “86 the car, it’s blocking the gate”
- ETA : The familiar abbreviation for estimated time of arrival – how long?
- Flying In: “I’m on my way”. It means you are en route, but not racing – safety first!
- 10-1 or 10-100: Radio speak for bathroom break – “It’s Danny, I’m 10-100″ (we can expect Danny to be off radio for a few minutes)
- Kill it: This means stop the noise they are referring to e.g. “Kill the air conditioning”.

Don’t Do This! (Accidental Transmissions):
“Cueing” a walkie means that someone has pressed their talk button without being aware of it. This means they are accidentally transmitting (like pocket dialling a phone). It’s a serious issue as it effectively shuts down all walkie communications until they stop transmitting.
It can be caused by a number of things. Inadvertently something may be pressing against the walkie button (a bulky jacket or leaning against something etc.) Or the walkie button may be “sticky” and doesn’t release after being pressed, due to a spill or some matter has worked it’s way into the mechanism. It can also sometimes be caused by plugging a headset into the jack when the walkie is already on (hence I mentioned above to plug the headset in before you switch the walkie on).
Cueing must be solved quickly as it can be extremely embarrassing for the person who is transmitting (imagine for a moment you go to the bathroom, drop your pants, your walkie is somewhere under there and accidentally gets switched on… it happens! Or you are chatting to another crew member about what you did last night or who you did last night as your walkie presses against your chair back…). But your embarrassment is secondary to the fact that you are blocking all other transmissions and the set is at a standstill while they listen to all that.
To avoid cueing be aware of the condition and placement of your walkie. Plus if you are going to do or say anything that should be kept private, then let your supervisor know that you will be off walkie for those few moments. If you hear someone else is cued, try and identify who it is and their location as quickly as possible. Find them and turn their walkie off until they can resolve the problem.
This may seem a lot to remember, but you will learn how to use a walkie pretty quickly. Because the rest of the crew will be using these protocols, and you will find it will soon become habit.
Related Articles:
InFocus Film Production Program
How to Pitch For A Film School Scholarship
Five Paths To Success After Film School
9 Ways to Get A Job in the Film Industry