How To Film With Green Screen
So you want to use a green screen in your next project! Green screen’s are a great way to introduce more fictional elements into your scene. In this blog post we’ll go through everything you need to know about how to film with green screen.
When it comes to blockbuster movies, we all know the fantastical backgrounds actually look quite underwhelming while on set. The real “magic” takes place in post production. By using green screens (and major help from VFX artists and compositors), filmmakers are creating worlds with an unbelievable sense of authenticity. Learning how to film with green screen can really level up your storytelling, no matter how small or large your production!
WHAT’S GREEN SCREEN & HOW DOES IT WORK?
Green screen is a visual effects (VFX) technique where two images or video streams are layered—i.e. composited—together. This technique called chroma keying involves replacing green colour with a new colour, image or piece of video footage. Think about behind-the-scenes clips or bloopers reels from Hollywood movies. It’s hard to miss the sheer amount of green you see on set.
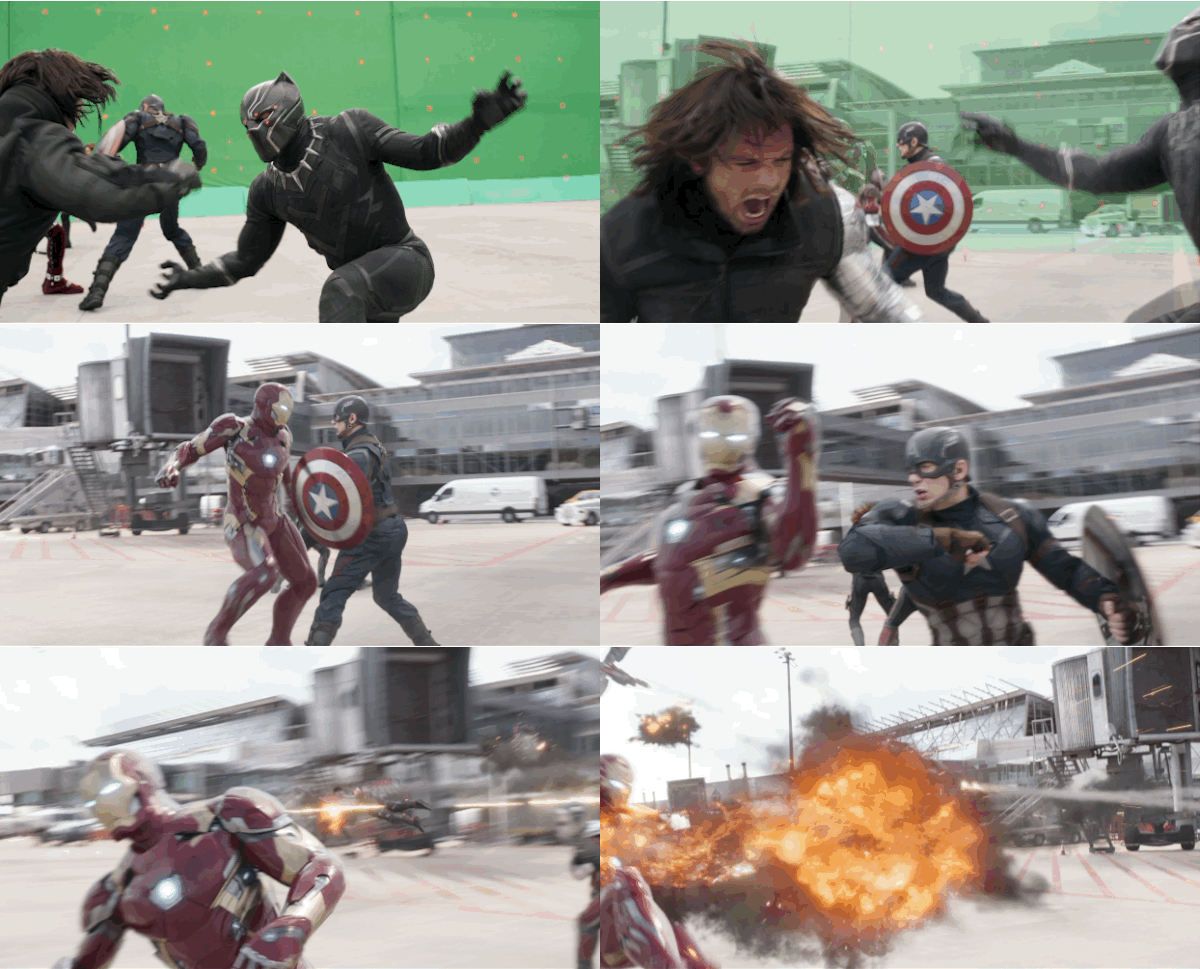
Green screen basically lets you drop in whatever background images you want behind the actors and/or foreground. It can also be used to replace the contents of a computer screen or a cellphone. It’s used in film production (and also in news and weather reports) to relatively simply place a desired background behind the subject/actor/presenter. Additionally, when a location isn’t available—like a fictional, alien, historic, futuristic or even just hard-to-access location—green screen comes to the rescue!
After the footage is shot, the compositors take over to bring in other on-screen elements:
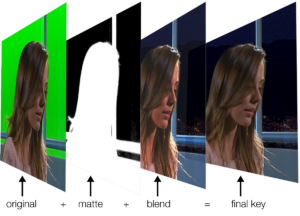
- A new background is composited into the shot (i.e. two images or video streams are layered together)
- Chroma key singles out the selected colour (usually green) and digitally removes it by rendering it transparent. This lets the other image to show through.
- Compositors can then add any new elements to complex moving shots that may be required for the final shot (such as smoke, fire, rain, etc.)
WHY THE COLOUR GREEN?
When it comes to chroma keying, a vibrant green or blue are the options of choice. Most often, a green-coloured screen will be your best option. This is because of a few reasons. First, the vibrant green is usually a distinctly different colour from anything on the subject (e.g. the actor’s clothes, eyes, hair, accessories). Secondly, green usually provides more luminance than blue, meaning it’s easier to light. The drawback to this is that green tends to bounce back more colour than blue screens, which could be problematic for low-light shoots.
But green doesn’t necessarily work for everything, even in well-lit shoots. You wouldn’t be able to film Kermit the Frog against a green screen, for example—he’d disappear! In cases like this, using a blue screen would be a better choice.

When it comes to green screen, the key rule is no matching colours! The background has to be a completely different colour from the subject. Otherwise, if let’s say your actor is wearing a bright green tie in front of a green screen, he’ll end up with a transparent strip down his chest where the tie is supposed to be!
HOW TO FILM WITH GREEN SCREEN: SETTING UP
1. NO GREEN OR REFLECTIVE SURFACES
Avoid green like the plague. Don’t have the subject wear or hold anything green or else the areas will be transparent once chroma-keyed.
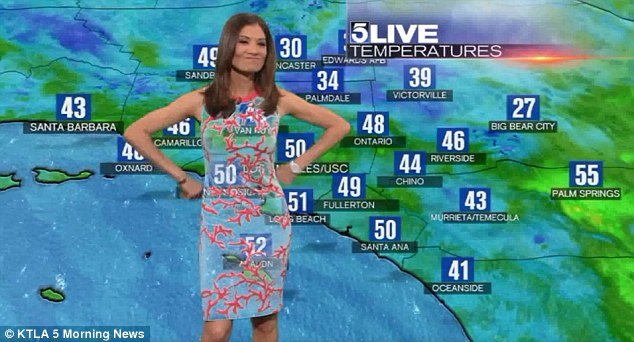
Reflective materials are also a no-no. Shiny objects (e.g. glasses, large jewelry, props, etc.) will pick up the green from the screen and will also be rendered transparent. Very small jewelry is usually okay though.
2. HAVE MAKEUP AVAILABLE
Actors can look pale and sickly against a green background. You might need some makeup adjustments.
3. ALLOW DEPTH
For a full shot of your actor, you’ll need to back up the camera to allow the full figure shot plus a good separation between the subject and the green screen (usually at least 6 feet to avoid “spill”).
Depending on the lens, you’ll typically want 25-30 feet depth for a full-length shot that doesn’t shoot off the edges of the background.
4. USE A “COVED” GREEN SCREEN FOR BEST RESULTS
To show your actor/subject from head to toe, the green screen has to continue down the wall and onto the floor under their feet.

A cove (a curved corner where the wall meets the floor) will smooth out the transition from wall to floor. You want to avoid shadows and hard lines that cause gradient changes in the green background.
5. LIGHT EVENLY AND SOFTLY
Light the green screen as smoothly as possible to give an even texture and gradient. The more even the lighting, the better and easier it’ll be to manipulate the material.
Keep the green screen itself as clean and smooth as possible to maintain a consistent colour range. If the screen is fabric, make sure there aren’t any wrinkles. If painted, keep extra paint on hand to touch up any scuffs and scratches.
6. LIGHT SEPARATELY
The green background should be lit separately from the subject to avoid: a) the subject casting shadows on the background (causing uneven gradient) and b) a green hue bouncing off the subject, which will cause problems when removing the background.
This is also why you’ll want at least six feet separation between background and subject.
7. KEEP THE CAMERA STILL
For simple green screen shots, keep the camera completely static. Lock down the camera so the subject doesn’t look like it’s vibrating or bouncing against the background when the camera moves even slightly.
Zooming also looks very strange when filming with green screen. Your subject will look like it’s shrinking or growing in relation to the background.
You can use motion control and motion trackers for more sophisticated 3D shots, but it’s a lot more work for the VFX team.
8. USE CHROMA KEY SOFTWARE THAT WORKS FOR YOU
Research and consider software based on the shots needed, the editing system, budget, and user experience. Your options for chroma key software will essentially depend on the type of shot.
There’s free, user-friendly software for simpler shots, but they probably won’t be able to pull off the more sophisticated effects you see in feature films.
And that’s pretty much all you need to know to learn how to film with green screen! It might seem complicated, but these tips will help your shoot go smoothly. So go ahead and set your story on an alien planet! With time and practice, filming with green screen can open up an entirely new, almost unlimited, creative playground.
Related Articles
Film Production Program – InFocus Film School
VFX Compositing Program – InFocus Film School
These Three Tips Will Brighten Your Lighting Game
Become a VFX Artist – Everything You Need To Know About A Career In VFX
TALK TO A PROGRAM ADVISOR
By submitting this form you are agreeing to be contacted by InFocus Film School. We will never sell or distribute your information, and you may opt-out of receiving emails from us at any time. Read our Privacy Policy here.

